
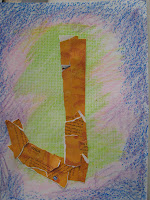
Wednesday, September 29, 2010
Robot
Tuesday, September 28, 2010
printmaking

This is both a printing lesson and a Complimentary Colors lesson. It's done using styrofoam 6'' x 8'' pieces. The students draw their name REVERSED and letters BACKWARD on a 6x8'' piece of paper., then use rulers to add patterns and designs onto their letters. The design are then taped to the styrofoam and the students go over all lines. When this is done, remove the paper ( which is generally in pieces) and deeped any lines which do not show up well. Print the styrofoam 4 times, let dry, and tape together. Susan
Monday, September 27, 2010
Khamsas

Friday, September 24, 2010
Aboriginal Animals


I did this project with my 5th graders for the "Original Works" fundraiser. Usually I do this with 4th grade and much larger, but they turned out wonderfully! You would be amazed at how into dotting they get.... I made folders with pictures of different Australian animals for them to look at when they sketched their animal, then they painted black outlines, and the next day they started dotting(with limited colors). Finally they paint the animal and finish the dots(with lots of colors o choose from). 3 classes total.
Statue of Liberty


I did this lesson with my 1st graders. It only took one day and they turned out pretty hilarious. It also goes along with the patriotic symbol SOL that 1st grade is teaching right now. :)
Tree of Life

They are looking great! I can't wait until we are finished so that I can display them.
Thursday, September 23, 2010
American Flag Collage
 This was a fun collage to make with my fifth graders. They started out with a 9x12 piece of white paper where they sketched out the American flag using a ruler and pencil. Then they searched through magazines to find their collage pieces to glue to their flag. (I recommended pages with print for their white stripes to make it more interesting.) Once their flag was complete, they got an 18x24 piece of white paper and made the black and white border for their flag by using big pieces of black and white photos from magazines. The students had the option of tearing or cutting pieces for their collage.
Monday, September 20, 2010
.JPG)
This is my sample for my lesson for the book "I am the biggest thing in the ocean." It took me forever to figure out how to post the pic. I want the blogging thing to work, but when it takes me this much of my precious time to accomplish something, it makes it really easy to give up. Will try to post again when I am not tired!
Rotating Symmetry Project
Lindsay and I found this project in a magazine a few years ago.. we tried it and loved it. The objectives are: The student will identify positive and negative space in works of art. SOL 4.6; The student will demonstrate and use motor skills.; Student will identify and use variety, repletion and unity in an art work SOL 4.5; Create original works that are symmetrical and complex; Combine colors and values in an aesthetically pleasing manner; experiment with overlapping
 I use a 12x 12 inch square piece of paper for the base. We fold it horizonatally, diagonally and vertically to make gluing guidelines. I have done this project with a fall theme and also with a winter theme. The kids love it and they turn out great.


Friday, September 17, 2010
Second Grade - Shapes

Thursday, September 16, 2010
Geo-Designs Positive and Negative space
 Geo-Designs
I do this art project with my fourth graders to get them thinking about positive and negative space. They start by tracing geometric shapes on the paper using a marker. After the shapes are traced they color and add pattern to the shapes. The negative space is then filled in with a black and white pattern (stripes, checkerboard, stars...) using a Sharpie.
Protractor Design
 Protractor Art
I have a class set of protractors and I did this quick art activity with my second graders. They traced the protractor over and over using markers. When the tracing was complete, they used crayons to color in the new shapes that were created. I used this as a first week activity to get them thinking about art.
Cave Art
 Ancient Cave Art
One of the fifth grade science SOL's deals with rocks and minerals. I take art back to the time of the cave man and we discuss the Cave of Lascaux in France. We discuss what materials ancient artists may have used, what they would have drawn, and the formation of caves. (There is a cool website that you can take a virtual tour of the Cave of Lascaux.) When we get to the Cave Art project, they use charcoal and chalk to do their drawings on tan construction paper after tearing the sides to make it look rough. After they do their cave drawing, they crumple up their artwork, uncrumple it and glue it to black construction paper. I then use their artwork in cave display in my showcase.
Shape City

Colorful Shape Cities
After a discussion about shapes, I gave my kindergarten classes pre-cut shapes to design a city. Easy lesson and the artwork always turns out well!
Robert Delaunay Art

Color Explosion
My third graders are working on these after making a color wheel. I got this idea from the book Making Amazing Art. These turn out great and gives them a chance to work with colors.
Line Drawings
 Line Drawings
This is another lesson I did with kindergarten after we talked about line and drew some different kinds of lines on the Smartboard. I had precut strips (lines) of different sizes and colors. They each got a black marker and drew some line patterns on the strips. The strips were then glued to the black paper.
Kindergarten Art

Initial Texture Designs
I have a bunch of plastic textured pages. The students put these under their papers and used large crayons to make colorful texture rubbings. While they were working, I went around and used a black Sharpie to write the first letter of their name. After the students finished with their rubbing, they took a magazine and tore long strips to paste over their letter. They all turned out cute and the kids really thought they had something!
Wednesday, September 15, 2010
Wild Things


Last year I did Wild Things with my 1st graders. They turned out super cute. It was a 3 week project.
Week 1: Draw Wild Thing, look at different types of patterns/animal designs to cover bodies to add, paint outlines with black paint.
Week 2: Colorfully paint Wild Thing.
Week 3: Cut out Wild Thing and mount on colorful paper. On scratch paper, create a name for Wild Thing and write a sentence about what your Wild Thing likes to do. I looked at their writing to make corrections before they made a final copy and glued it onto their artwork.
Enjoy!
Monday, September 13, 2010
Secondary Scarecrow

I do Secondary Scarecrows with second grade. We look at examples of scarecrows around the world and I read them a little about the history of scarecrows including the way they were used by Native Americans.
I don't see how to attached the lesson plan, so here it is below all cut and pasted...:)
Title of Lesson: ____Secondary Scarecrow_______
Grade Level: _______Second Grade_____________
Concept: Students will draw a scarecrow and use secondary colors.
Time Allotment: 2, 45-minute class periods
SOLs: 2.3(1), 2.4
Objectives:
The student will be able to identify and use secondary colors.
Literary sources will generate ideas for works of art.
Vocabulary: secondary color, scarecrow, watercolor wash
Resources: teacher’s example of finished project, The Scarecrow Book, by James Giblin and Dale Ferguson
Materials: 9 x 12 white paper, circle tracing shape, pencils, crayons, Sharpie markers, blue watercolor wash, brushes, newspaper for table/desks
Activity:
Day One:
- Ask who has seen a scarecrow? What do we use them for? Talk about the history of scarecrows and show students examples of scarecrows from the past and present.
- Review primary colors and secondary colors.
- Tell students that they will be following the teacher and drawing a scarecrow step-by-step.
- Have students trace a circle in pencil about 1 ½ below the top of their papers – vertical position. Go around and check to be sure they are in the right place.
- Going step-by-step, have students follow you as you draw the scarecrow. Mention that the sleeves are rectangles, lapels are triangles, etc.
- Show students where to erase pencil lines after hat is drawn. Now they should go over their pencil lines with a black permanent marker. No coloring in with the marker!
Day Two:
- Review relevant points from last session. Tell students that today they will be coloring in the scarecrow using crayons and secondary colors. Pants are green, face is orange, and coat is purple plaid (demo how to draw plaid). They may use any other colors they would like on the rest of their pictures. Color hard and add details like pumpkins, mountains, etc. to the background.
- Finish the artwork by adding a wash of blue watercolor.
Check for understanding/closure: Did students follow directions/understand objective? If time allows, students may share their work with class.
Assessment: followed directions?
Subscribe to:
Posts (Atom)