Wednesday, September 25, 2013

Back to School Project

All Hands on Deck
This year's back to school art project was for everyone in the building to trace their hand and then decorate it to tell about their selves. They could include favorite hobbies, subjects, colors, teams, foods etc. Once they were cut out I assembled them into a large banner to display for Back to School Night. Everyone was excited to look for their hand.


Here's a close up of some of the hands:

Thursday, October 11, 2012

Fourth Grade ~ Fundraiser Idea

Khamsas / Hand designs worked great for the fourth grade fundraiser. Bright colorful and all look great!


Wednesday, October 3, 2012

Owls


Third grade made Owls for the fundraiser activity. Again, excellent results! Sharpie and water color crayons.....

Fish ~


Add caption


The PTA signed us up for a fundraiser, so I've been working on that the last few weeks. I've tried over the years to find projects for the children that are bright, colorful and have a really high rate of success. I'll post some of the things I am doing this year. Second grade did fish. We drew them and then outlined with Sharpies. We used water color crayons for the color. They are coming out beautiful. Very impressed!

Monday, September 24, 2012

Contour Line Drawing

1.Show an example of a contour line drawing. Explain that you only draw the outline. No details. You must look at the object, this is drawing from life not imagination. 2.Demonstrate the project. 3.Look at the gourds for about 30 seconds. Look at the shape and color. Place them in the middle of the table and do not move them. 4.Draw the gourd at least 5 times. Overlap them. Draw the ones closest to us large and the ones far away small. You can draw more if you have extra time! 5.Add sharpie. Day 2 1.Add colored pencil. Overlap the colors to make new colors. Really look at the gourds to see the color. Are they all yellow? (orange/green) 2.Add watercolor. You can use the watercolor to make shadows under the gourds. What colors will work for shadows?

Thursday, September 13, 2012

Kandinsky Colorweaver

THis is a great activity for students that finish work early instead of just a free draw. THis is from Art Projects for Kids: Kandinsky Colorweaver Wassily Kandinsky made a beautiful painting called "Color Studies" back in the early 1900's that is fun to imitate with oil pastels instead of watercolor. 1. Distribute 9" x 12" pieces of art paper to students. Give them rulers to measure and draw pencil lines across the middle of the paper in both directions. 2. Ask the students to start in the center and with an oil pastel, draw an angle and fill in the triangle that is created. Continue around the center with drawing triangles, only changing colors each time. 3. Once a diamond is created, add bands of color around the diamond, always changing color on the pencil lines. Continue until the paper is filled with color. This picture was made by a kindergartener in an afterschool class.

Wednesday, September 5, 2012

Beginning of the Year....

Sorry, it's been a while since we've updated... I'm going to try to get it going again.... This year as an opening project I had EVERYONE in the school create a self portrait. I sent out emails to the staff and placed the paper in the staff's mailboxes. The children created theirs in art class. We colored them in and cut them out. I actually cut out kindergarten since it was their first art lesson of the year. It was interesting how many of the teachers tried to get creative when it came to turning their's in. Many had their friends, children,  or co-workers draw them. I introduced the children to the Where's Waldo books... yes introduced, hard to believe so many had never heard of them. I then glued all the self portraits on a large sheet of bulletin board paper with the principal as our Waldo. She was very prompt about turning her self portrait in, and I might add did a great job on it.  Needless to say our display is getting quite the response in the hallway. It's been a fun way to start the year.

Wednesday, June 6, 2012

Monarch Butterflies


We wrote a grant at my school to build a butterfly habitat.  Each class was given butterfly larvae to watch. When they turned into butterflies they were put into the butterfly sanctuary outside the Library.  Interest was high on the subject of monarch butterflies!  My second grade students first drew the butterflies in pencil and colored with orange, black, and white crayon.  The next week they used oil pastels and watercolor paint for the background.  The paintings were beautiful in the hallway next to the Library and I ended up with a great lesson on teaching symmetry in nature.

Wednesday, February 15, 2012

Hearts with Tints and Shades


I have fourth grade students divide their paper into 1/4's and trace a heart in each section. I teach a lesson on tints, shades and also complementary colors. We used tempera paint cakes to paint them. I let them decide how to paint the hearts and background but encourage them to try a few tints, shades or a complementary color combination. It could also be used with patterns.


My Family


Kindergarten students end up with a red heart to give away and a heart framed drawing of their family to take home. I fold red paper and pre-draw 1/2 of a heart for them. They cut on the line, open it up, and are amazed that they have a perfect heart! They decorate their heart or write a message. We glue the heart frame to white paper and they draw their family.

So sweet.


Favorites From February


Clay Hearts with Coiling

3rd Grade

Third grade students roll clay out with rolling pins, use heart shaped cookie cutters to cut a heart shape. I teach a lesson on coiling and they add at least one coil on top of their heart, some add three or four. We glazed them.


Wednesday, February 1, 2012

Snowflakes...


This is a quick and fun lesson on symmetry and cool colors... I had the students draw snowflakes with sharpies. We then went over the lines with regular crayola markers (cool colors). They took a paint brush and spread water over the markers to make it blend. The next week we added white glitter to the snowflakes.

Saturday, January 28, 2012


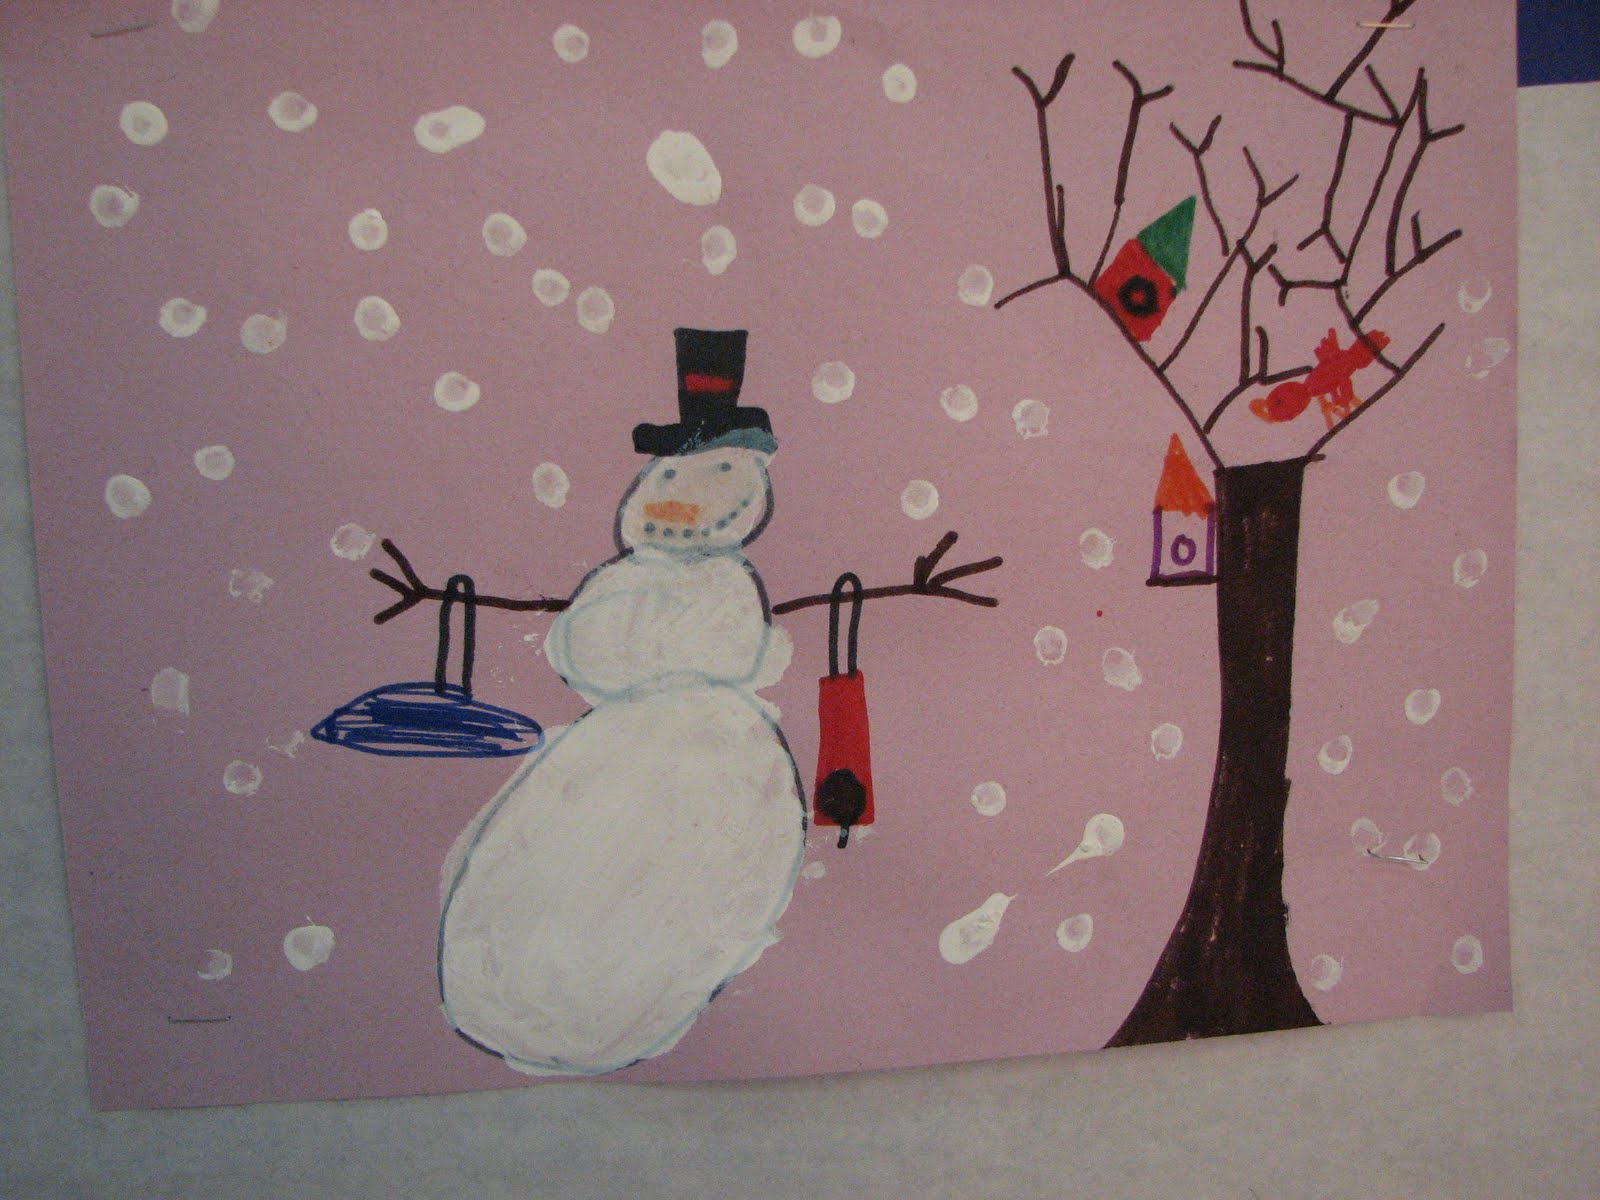
I did these projects simultaneously with first graders. The first week we talked about patterns and glued all the pasta to create a radial pattern snowflake. While they worked on that, I also called one group at a time to paint the snowballs for their snowman. We used a half way blown up balloon as a stamp to stamp the paint onto the page. The next week they painted their pasta snowflake white and we read The Biggest Best Snowman. They then finished their snowman by adding all the details with construction paper crayons.
This project was based on the book Owl Moon. We drew and painted the owls the first week, then the second week we read the book and talked about how to create art by working together (incorporating the second grade collaborative art SOL). Each table was responsible for painting their tree and moon as a group. They then taped their owls onto their tree.

Friday, January 27, 2012

Art & Literature: Winter


I read The Biggest, Best Snowman to first graders before we did snowman drawings with black crayon and chalk. I showed them how they could layer three different colors of chalk and then blend them together with a kleenex for the background.


Art & Literature: Winter


I read Kevin Henkes book Birds before we did mixed media snow scenes including birds in winter.


Tuesday, January 24, 2012

Cityscape in Winter


It Fell in the City

I read the poem by Eve Merriam It Fell in the City to kindergarten students.

They cut out paper shapes to make their cities, added details, and then used q-tips to

paint on the white tempera for snow.

Wednesday, January 11, 2012

Friday, December 16, 2011

Painted Cardinals


I found this lesson here:

Supplies:
• 12″ x 18″ white paper
• Blue metallic tempera paint (Michael’s craft store will have this paint)
• Pencil
• Black, red, yellow and white tempera paint
• Q-tips for snow


1.Look at pictures of cardinals. Talk about positive and negative space. (The cardinal and trees are positive, the sky is negative)
2. Explain however, that it’s not necessary to draw the entire body, just the head and neck area.
3. Draw the cardinal's head and neck, then branches behind him.
4. Add blue sparkle paint in the sky (negative), the beak yellow, add brown for the branches, paint the cardinal red, and last paint the black patch around the eye.

Week 2:
1. finish painting.
2. with a thin brush paint black outlines (or you could give the students sharpies)
3. Paint white dots for snow.

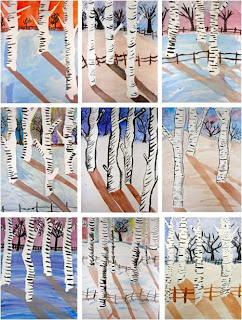
Winter Birch Trees


I found this lesson on Deep Space Sparkle:

We looked at Monet’s painting “Magpie” and talked about the winter landscape.

Supplies: 9″ x 12″ watercolor paper (school grade “Biggie” Brand or Canson), watercolor palette including white (if you don’t have white watercolor/gouache use tempera paint), masking tape or blue painter's tape, salt, small and medium size watercolor brush.

1.Tear strips of masking tape in half lengthwise (not easy) and use ripped or torn edge for the outside of tree. Place the straight edge towards the middle. Do again so there are two torn edges creating the tree. Add branches if you would like. Smooth down with back of fingernail. Make sure ALL trees extend off the top of the paper.
2.Paint a line across the trees near the top. (horizon line)
3.Mingle two or even three colors together to create a winter sky. I like blues, reds, and purples but the children will know what colors they like. It helps to lay down a layer of water so that the colors blend easily. As soon as the color is on, sprinkle salt onto the paper (right).
4.Painting snow can be a bit tricky. I suggested that the students mix a bit of white paint with a touch of brown and paint over some areas of the painting. You could also choose blue but brown makes a better contrast to what is almost always a blue sky. explain shadows.
5. On the white board, next to my sample painting, I drew a sun in the top right corner of where my painting hung. From there, I could draw an imaginary line to demonstrate where shadows would fall. Paint all the way off the paper.
6. Using a small brush and black paint, draw trees along the horizon line. Paint right over the masking tape.
7.The quickest and easiest part of the lesson: bark. Peel off masking tape. If it tears, don’t worry. Just glue wayward piece down (glue stick,not white glue). Using a small brush and the black watercolor paint, paint small curved lines across the tree. Add a fence along the horizon line and in the foreground too.